Monday, November 26, 2012

Cake Decorating Tools

It's been awhile since I last updated our blog. I got caught in the french macarons obsession.
french macarons after my 10th try arrrgh!

Today, I would like to discuss about some important cake decorating tools that a baker or a cake decorator SHOULD have in her haven, I mean her kitchen. Time and again I have shared to my students that cake decorating is easier and more efficient if you have the RIGHT tools for the job. If you have the right tools for cake decorating you will achieve more professional results. All are available from cake decorating supplies store and online store is just one way to conveniently get them.  


I can only limit my discussion with FONDANT cake decorating since that is my expertise and I can only share what I have been using all these years. 

FONDANT PREPARATION
In preparing fondant dough (go check my blog about fondant in the Philippines), you will need a mixing bowl which is suitable for microwave. When I was in the Philippines, I bought mixing bowl in SM which is big enough to prepare fondant (P250+++ each) 


You will need also a wooden spoon which will only be use for fondant making...exclusively for fondant it is!  Don't use it for cooking or icing preparation. JUST FOR FONDANT! Buy also a big strainer for sifting your powdered sugar. Save yourself from agony....go and sift your powdered sugar in order to avoid big chunk of powdered sugar once you knead in the melted marshmallow.

exclusive for fondant


Invest also for a durable and dependable silicon working mat. Trust me, it will be your best friend from day one. One that I will recommend is Ateco Silicon mat. One of the reasons I love this mat is because I have no issues with sticking and cracking on my fondant once I start rolling it out. Here is my Ateco Silicon mat which I bought in 2008. It has been my best companion in rolling out my fondant all these years. I know that there are several working mat in the market but for those of you who would like to invest on good quality tools, I can suggest this wonderful working mat. I know it is quite expensive, but hey, it's all worth it!

my favorite silicon mat!

Can you still prepare marshmallow fondant even if you don't have a microwave? YES! Use a double broiler to melt your marshamallows. Make sure that the bottom of the mixing bowl placed over a pot of boiling water does not touch the water underneath. TIP: Keep mixing the mallows until completely melted.

I would also emphasize that you have to buy a clingwrap plastic and ziploc plastic bag in storing your homemade fondant. Once you have prepared your fondant, you may want to let it rest OVERNIGHT so that the sugar which are not well incorporated well through kneading will have enough time to incorporate with the dough. I have also noticed that a colored fondant has more vibrant color after it has rested overnight. No need to refrigerate. 

no air!

let me rest overnight zzzzzz

CAKE DECORATING TOOLS

Now that you have your fondant dough, you can now explore the world of cake decorating using that fondant dough. 

Here are my top favorite things which I use in decorating my cakes and same things I can recommend for beginners:

MODELLING TOOLS. These are bought in set or singly and use to draw on, shape, frill or hollow out soft surfaces such as fondant and gumpaste. My first set of modelling tools is the Wilton set. I was jaded with it's pretty packaging but I seldom use them. I end up buying other brands and bought them per piece or another sets.

Wilton Set.
FROM LEFT: ball tool, bone-end tool, frilling tool,  mini-quilting-end tool, comb tool,, mini-spatula, small frilling tool, mini-roller tool, star tool and anger tool.
Organize your tools using an icedrop molder

Fat Diddo's mini-roller tools and comb tools. I bought them per piece at $7.69.

When I went to the Philippines, I saw in Divisoria same modeling tools as Fat Diddo's. The price for a set is even less than the price of a piece I bought. But I didn't feel sad because when I examine and scrutinize the quality of the material, I know my tools will last a long, long time.

One of my favorite set of tools is this set.....

bone tool (small and large), star tool, ball tool, veiner, sculpting tool, ball tool
and that pink sculpting knife/frilling tool


I confess that in every trip to my cake decorating supplies store, I make sure to buy a piece of modeling tools. I just love collecting them!


ROLLING PINS. I always recommend to buy one large rolling pin and one small. If you have the budget, buy a rolling pin that is 20 inches long and made of white, hard, polyethylene plastic. It is non-stick and very convenient to use on fondant and gumpaste. In covering cakes with fondant, use a longer rolling pin in order to achieve a perfect round, rolled out fondant. With that result, it would be easy to cover a round cake without having trouble of having elephant-skin fondant or cracking. I would also recommend small version of this kind of rolling pin whch is only 7 inches long. You will use this kind of rolling pin for making cake decoration or cake toppers.


small, medium and large rolling pins
 

PAINTBRUSH. These tools are important as modeling tools because it is very useful and versatile. I use paint brush in applying tylose glue on my fondant. I also use them to apply luster dust, disco dust, petal dust on my gumpaste. I used the handle as frilling tool or when I just need to make a tiny indent on the fondant (just make sure it is thoroughly clean). I also use them in making my swag around the cake. I would advise that you invest on good quality paintbrush. Don't buy the synthetic ones because you will have some trouble on applying colors or dust on your fondant. Again, go for QUALITY!


FOOD COLORING. I think I have thoroughly discussed why I personally love Americolor brand for gel food coloring in my previous blog. I just want to emphasize that you should collect the basic color and if you have extra cash, try to collect additional colors to save time and effort on adding color to your fondant. Buy also the electric colors like electric pink, blue, yellow and green because the color is so vibrant....you will love it.

starter kit

 
IMPRESSION MATS. I have a huge love for these tools because it simply add beauty on a plain fondant. There are variety of designs to choose from. I started collecting the Makins' textured sheets which I have used a hundred times on my cake decorating activities. I also love the Autumn Carpenter's Floral and Fabric sets collection. They are the daintiest ever!!! For texturing fondant cakes, buy impression mats which are 24" x 20" in size. The designs I can recommend are swirls, floral and cobblestone. These are the three basic designs which are useful to me.


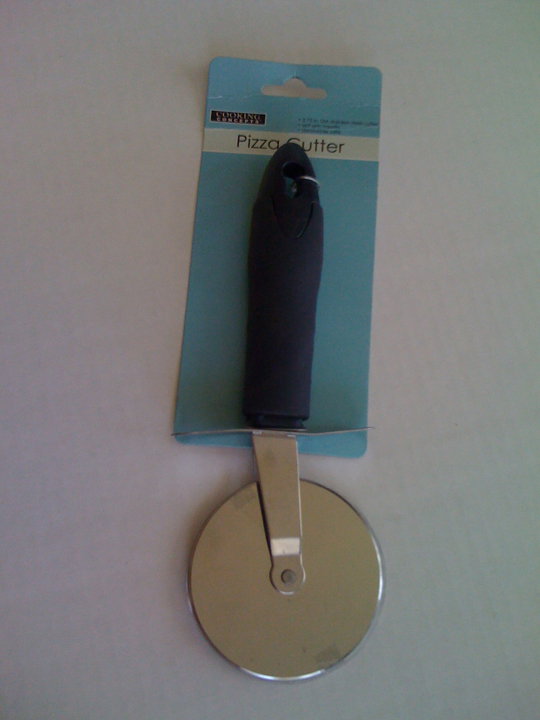
PIZZA or PASTRY CUTTER. I love this tool because it is easier to cut fondant strips or cutting off excessive fondant on the cake.


COOKIE CUTTERS. Cookie cutters have become more useful nowadays because it can be used on decoratiing fondant cakes too. I teach my students to collect cookie cutters because it is very useful on creating different designs and shapes. It is easier to decorate cupcakes and cake in a consistent design if you have a reliable cookie cutters. I've been baking and creating hundreds of cupcakes and I will not be able to finish it in one day if not for my reliable cookie cutters. I can prpeare my cake toppers or cupcake decoration few days ahead by using my cookie cutters.


I would humbly encourage you to collect them in different shapes and designs!

If you wonder why a certain cake artist came up with a beautiful fondant cake.....you must consider the factor that he or she has the basic and huge collection of these above-described cake decorating tools. The more they have these tools the more it is easy for them to create beautiful, pretty and dainty cakes and cupcakes. If you invest on quality products, you will be rest-assured that they are legacy for you to pass on to your kids who wants to bake and decorate cakes too. Again, when you buy your cake decorating tools, always consider the durability, usefulness and reasonable price. Buy only stuff that you can use on your cake decorating activities. Don't you just hate it when you buy something so expensive and yet it has been sitting there on your tool box for 2 years?

In choosing cake decorating tools, like in marriage, pick the RIGHT one!

Happy Baking everyone!


Tuesday, November 20, 2012

SHINY, SHIMMERING Splendid!

I received a LOT of inquiries regarding the pearl, gold and silver glaze that we offer in our online store.


I have to post this blog now or else......I would suffer in redundancy of explaining that confectionery glaze is the same as the above-mentioned glaze. The only difference is that our glaze is colored. You can only apply it if you want a satin-look or pearly-white-looking finish on your cake decoration or cupcake topper. Simply put, apply the peal glaze on white fondant....apply the silver on black or gray fondant and gold glaze on yellow or gold-colored fondant.
 
Now, is these the same as luster dust or petal dust?
 
ANSWER: The effect is totally different. To illustrate, here is my sample picture of the effect of the glaze, luster dust and petal dust on a simple leaf fondant. TIP: Make sure that when you apply these decorating items on your fondant or gumpaste, the cake decoration is already set or has harden enough. Don't brush it over the surface of your fondant/gumpaste when it is still soft. You won't like the effect! Trust me! Practice patience!


As you can see from the picture, I have applied a pearl glaze on the green leaf, so the result is not satisfactory. Maybe if we try applying the clear one, the result would be better. Glossy it is! I only use my pearl glaze on white colored fondant like wedding gown, white ribbon or bow or even on plain cake covered with white fondant or cupcake topper.
 
Luster dust powder will give a shimmer effect on the fondant/gumpaste. I just love that look!
 
Petal dust will make a real-looking effect on the fondant. As shown in the photo, from a plain green leaf, I have applied apple green on the leaf and VOILA!!!! the leaf looks almost real leaf....only that this one is edible and yummy!

Now, here is a sample I made on applying the pearl glaze on my cupcake topper. A sample of plain white fondant is the barong tagalog topper, while the two wedding gown topper has been brushed with pearl glaze. I don't know if my photo has given it justice but the finish of the toppers has a SATIN-LOOK...just what I really wanted. It has some "character"! See?


I can not find my other photos where I have used the silver glaze and gold glaze. But believe me that the effect is the same. GLOSSY, SHINY and SATIN LOOK. It has a shimmer-effect also. I remember using the silver glaze on my Cars cake topper. I applied it on the metal-parts of the cars. I just love the result. It is shiny and glossy. You may also want to dilute it with drops of Vodka because the liquid is concentrated.  TIP: Just pour some amount in another small container (with sealable cap) and add in Vodka. You don't have to consume or use all the glaze in the bottle. Small amount will do.  If there would be leftover after you have finsihed decorating your toppers, just put a cap or seal your container. You can still use it on your next cake decorating session just add DROPS of Vodka again.  Again, please don't dip your brush directly on the small bottle of glaze because this may cause spoilage or contamination. That is why I recommend just pour the amount you will need on a particular project in another or separate small container.
.

One thing more, confectionery glaze lasts long because a small amount could satisfy the effect that you really want on your cake decoration. Our glaze is KOSHER CERTIFIED, so it is 100% safe. My issue with luster dust or petal dust, it is stated in the label that it is "NON-TOXIC" but nothing there certifies that it is safe to eat. I don't want to be responsible for not sharing that thoughts with you. Maybe, that is the reason why they only use those powder on flowers or leaves for decoration purposes only. Time and again, I want to impart that be responsible enough on what you prepare...consider that it is your business you are protecting and also the health of people who are going to eat the cake and cupcakes.

I hope that this blog could somehow enlighten some of you. Again, I only want to advise you that buy only stuff that you will use and when you buy, like in voting, be WISE!

HAPPY BAKING and CAKING!!!!


Miles
Bake It Dainty


Wednesday, October 10, 2012

WHY I LOVE CAKE CIRCLES

I received numerous inquiries about "CAKE CIRCLES". What is it? How to use it? and of course, how much? 

Cake Circle is a dry wax paper which is great for lining the bottom of round cake pan. These convenient cake liners facilitate clean up and easy release of a baked cake from the pan.  They prevent cakes from sticking to the pan during baking and to give the cake a protection from the heat of the oven.

cake circles, pans, butter and small amount of flour


I will admit that I used to hate preparing pans before I start baking. I find it time-consuming to trace the bottom of the circles, fold a wax paper, cutting it and having an inaccurate round paper lining (arrrgh). Then, one fateful day during my trip to a local cake decorating supplies store, I saw those pre-cut cake pans liners....whooooohooo! CAKE CIRCLE it is!  I was happy in knowing that my baking will be less tedious and will not be tiresome. Now, I don't hate preparing pans anymore. It is easy as counting 1-2-3. When there are days that I have to bake more than 3 cakes, cake circles are surely my best friend!

These are the following steps for preparing cake pans....

First, prepare desired size of cake pans, cake circles, unsalted butter or vegetable oil and small amount of flour.

Grease the bottom and side of the cake pan with unsalted butter. If baking chocolate cake, use vegetable oil. Don't overdo greasing the bottom and side of the pan because it might affect the taste of the cake. Just enough to grease the surface. TIP: I love using a small frozen butter in order for me to spread the butter evenly in the bottom and side of the pan.

grease bottom and sides

Here is my favorite part....place the cake circle on the bottom of each pan. LOOK at that, just perfect fit for my pan. Easy! No sweat!


perfect fit! 
 Then, grease also the top portion of the cake circle....make sure to apply evenly.

small stick of butter will do the trick

 Put small amount of flour on the top of the greased cake circle.

powder time!
Then, tap the side of the cake pan. While tapping and shaking the cake pan, you will notice that the flour is spreading evenly on all sides of the cake pan and on the top part of the cake circle.


Your pan should look like this before you pour your batter.

ready to bake your batter

With this technique, you will be able to release your cake easily from the pan without damaging the side or bottom part of it.  When the cake is already baked, let the cake stay in the pan for 10 MINUTES, then YOU MUST place it upside down on a cooling rack. It will be an easy release! Then, peel off the cake circle IMMEDIATELY! (yes, while the cake is still hot). TIP:  Just place the cake circle on the top of the surface where you peeled it off in order to keep the moisture inside the cake and prevent the air to penetrate inside the cake.


I also use cake circle to hold the top of a layered cake while coating the side with buttercream or ganache. I don't touch the cake with my bare hands. 


I also use cake circle on my tiered cakes. I make sure that before I place another layer on top of a cake, I put a cake circles (same size of the cake I will place on top of it) so that the bottom part of the cake board (which bottom have touched different surface in the kitchen, eeeeew!) will not have contact with the fondant covering the cake.  Just like in this latest cake that I made for our anniversary, there is a cake circle in between.

anniversary cake


I would suggest that if you are using a dummy cake on the top of your fondant cake,  lined the top of the fondant cake with a cake circle (same size of the dummy cake). In that way, the styrofoam will not touch the edible part of the cake. Cleanliness and safety should also be a priority when baking your cakes, right?


Happy Baking everyone!

Thursday, September 27, 2012

RUFFLED SKIRT & CROWN TOPPER

Continuation........


I would advise that when you are making a topper, make it ahead of time. You can make them weeks ahead. If something happens to the topper there would be enough time to troubleshoot, right?


PROJECT #2: CROWN TOPPER

My dear friend (Jannette) asked me to create a princess-like cake topper. SO, I went to my collection of cookie cutters and dig what I can use for this cake project.....tadaaaan!


daisy cutter

crown cutter
I will admit it.... DAISY cookie cutter is one of my favorite cutters because of its versatility. I can use it in many ways other than making DAISY COOKIES. But before I discuss the ruffled skirt using a daisy cookie cutter, I prepared the crown FIRST!

Get a fist-size fondant. Knead it a bit and put GUM ARABIC POWDER or GUM TRAGACANTH POWDER (see the picture below). You will only knead in 1/2 tsp of (any) powdered above-mentioned into the fondant. Roll out the fondant dough in 1/4 inch thick. By using a crown cookie cutter, press it against the fondant. You may also design the surface of the fondant (before pressing the cookie cutter) by using impression mat or textured sheet.

knead in gum arabic powder in order
for the fondant to harden like a "figurine"
cute crown cookie cutter


Place the crown on top of an elongated tube and set it aside. The following day, the crown is very hard and becomes breakable. Perfect for painting it with your desired color. You can use gold gel paste diluted in Vodka or any clear alcohol. Or simply dust it with luster dust or disco dust. Design the crown as you wish. BE CREATIVE! You can use dragees to decorate the crown or use a piping tip to put small holes on each edges of the crown.

let it rest until it becomes stable and hard as rock


I also made a circlar tag for the cake using a fluted 1 1/2 inch round cutter. Then I use a piping tip with a small round tip to decorate the edge. Let it dry like the crown.


PROJECT #3:   RUFFLED SKIRT

Using my daisy cutter, I cut pink rolled out fondant. The fondant should be rolled out very thin in order to create an illusion of a fabric for the skirt.


Use a 1 inch diameter round cutter (MAKINS' ROUND CUTTER SET) to make a hole in the center of the daisy.


I use my very reliable (also one of my favorite tools) mini palette knife to cut the daisy (see photo below)
my ever reliable palette knife
Using a ball tool (plastic ball tool will also work well), carefully roll it against the edges of the fondant daisy. On each petal, the movement should be half circular (up and down). LIGHTLY PRESSING BUT NOT TOO HARD.


I use piping gel to glue the fondant to the dummy styro cake. In that way, I can control the attachment and can possibly make movement and adjustment. VERY IMPORTANT: dab piping gel only on the inner edge of the daisy...that portion to be attached to the styro or cake. Avoid putting piping gel at the back of the petals!

dab a bit of piping gel at the back of the daisy.
Place the gel on the side touching the styro. Get IT?

Using a smaller ball tool, flip up some petal of the stretched out daisy. Do one daisy at a time because if you cut out to many fondant it will dry easily and the edge will tend to crack once you press the ball tool against the edges of the fondant as it dries out easily once expose to air.


I rolled into tiny circles a tissue/table napkin and place it in between flipped petals and let it set for 1 day. The following day, when I checked the skirt, they all dried up and I carefully remove the rolled tissues.

small ball tool helped me to positioned the tiny tissues in between

Want to check how it turned out? Here it is.....

skirt & crown

Have a great weekend everyone!